Learning how to forge a knife from raw steel is a rewarding process that blends craftsmanship, patience, and practical skill. Whether you’re interested in making your first blade or just want to understand the basics, following a structured approach ensures safety and better results. This guide provides a clear, knife forging step by step overview, covering essential tools, materials, and each stage of the process.
Before diving into the details, it’s important to note that forging knives requires preparation and respect for both the craft and the tools involved. For those considering custom work or seeking a professional, you may also find value in these custom knife maker selection tips to help choose the right smith for your needs.
Essential Tools and Materials for Knife Making
Before starting the forging process, gather the necessary equipment and materials. Having the right setup not only makes the process smoother but also ensures safety and quality results.
- Forge: A propane or coal forge is required to heat the steel to forging temperatures.
- Anvil: A solid, flat surface for shaping the steel.
- Hammer: A cross-peen or rounding hammer is ideal for beginners.
- Tongs: Used to hold and manipulate hot steel safely.
- Steel stock: High carbon steel such as 1084 or 1095 is commonly used for blades.
- Quenching oil: For hardening the blade after forging.
- Files and sandpaper: For refining the blade’s shape and edge.
- Protective gear: Safety glasses, gloves, and a heavy apron are essential.
With these tools and materials on hand, you’re ready to begin the step-by-step process of creating your own knife.
Preparing the Steel: The First Step in Forging a Knife
The journey begins with selecting and preparing your steel. Choose a piece of high carbon steel, as it offers the best balance of hardness and durability for blades. Cut the steel to your desired length, typically 8–12 inches for a beginner’s knife.
Mark the basic outline of your blade on the steel using chalk or a marker. This will serve as your reference during the shaping process. Ensure the steel is clean and free of rust or scale before heating.
Heating and Shaping: The Core of Knife Forging
Place the steel in the forge and heat it until it reaches a bright orange or yellow color (around 1,800°F). At this temperature, the steel becomes malleable and ready for shaping.
Using tongs, transfer the hot steel to the anvil. Begin hammering the steel to form the blade’s profile. Focus on establishing the tang (the portion that will become the handle) and the general blade shape. Work in small sections, reheating as needed to maintain the correct temperature.
As you hammer, pay attention to the blade’s thickness and width. Beginners often find it helpful to work slowly, checking the blade’s symmetry and straightness after each heat. Remember, forging is about gradual progress rather than rushing to the final shape.
Refining the Blade: Drawing Out and Beveling
Once the basic shape is established, the next step is to draw out the blade and create the bevels. Drawing out involves lengthening and thinning the blade by hammering along its edge. To create bevels, angle the blade slightly on the anvil and strike along the edge, forming the sloped sides that will become the cutting surface.
This stage requires patience and attention to detail. Consistent hammering and frequent reheating help maintain control over the blade’s geometry. The goal is to achieve a rough blade shape with defined bevels and a straight tang.
Normalizing and Annealing: Preparing for Hardening
After forging, the steel’s internal structure needs to be reset to relieve stress and improve toughness. This is done through normalizing and annealing:
- Normalizing: Heat the blade to forging temperature, then allow it to cool in still air. Repeat this process two or three times.
- Annealing: Heat the blade again and let it cool slowly, often by burying it in insulating material like vermiculite or ash. This softens the steel, making it easier to file and grind.
Proper normalization and annealing are crucial for a strong, reliable blade.
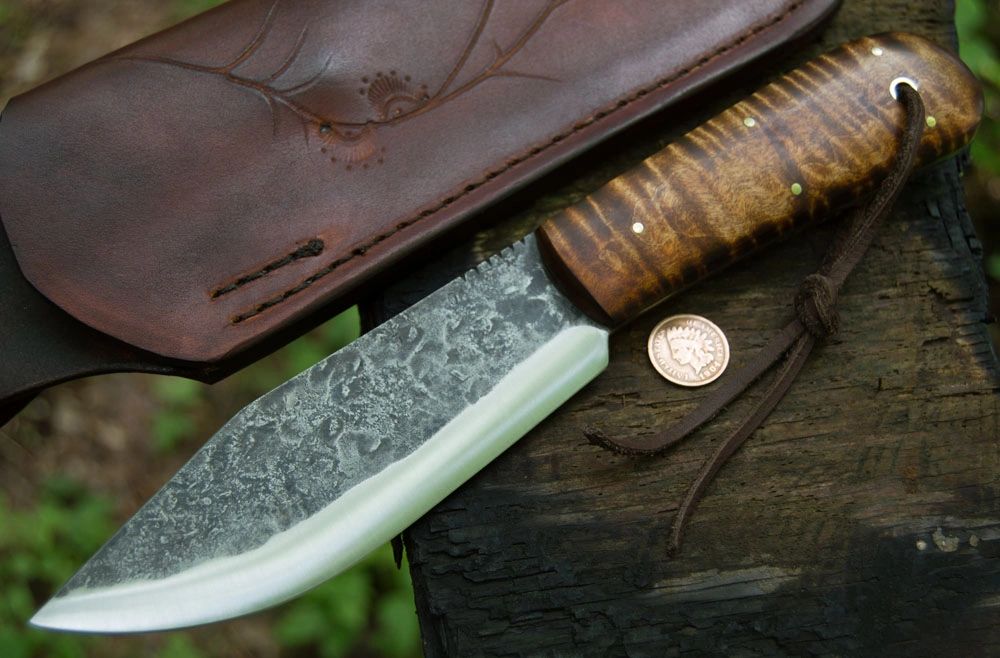
Grinding and Shaping: Bringing the Blade to Life
With the blade softened, move on to grinding and shaping. Use files or a belt grinder to refine the blade’s profile, smooth the bevels, and shape the tang. Take care to maintain even bevels and a straight edge.
At this stage, you can also drill holes in the tang for handle pins and refine the point of the blade. Sandpaper is used to remove tool marks and prepare the blade for heat treatment.
Heat Treatment: Hardening and Tempering
Heat treatment is a critical step in the knife forging step by step process. It gives the blade its hardness and durability:
- Hardening: Heat the blade to a critical temperature (non-magnetic, usually around 1,475–1,500°F), then quench it in oil. This rapidly cools the steel, making it hard but brittle.
- Tempering: After hardening, the blade is too brittle for practical use. Tempering involves heating the blade to a lower temperature (350–450°F) for an hour or two, then allowing it to cool slowly. This reduces brittleness while maintaining hardness.
Test the blade for hardness and flexibility. If it chips or snaps easily, repeat the tempering process at a slightly higher temperature.
Finishing Touches: Handle and Edge
With the blade heat-treated, it’s time to add the handle and sharpen the edge. Handles can be made from wood, micarta, or other durable materials. Fit the handle scales to the tang, secure them with pins or epoxy, and shape them for comfort.
Finally, sharpen the blade using progressively finer stones or sandpaper. Aim for a consistent, sharp edge suitable for the knife’s intended use.
Learning More About Bladesmithing
Knife making is a craft with deep history and evolving techniques. To explore how these methods have changed over time, consider reading about the art of sword forging from ancient techniques to modern innovations. This resource provides valuable context and inspiration for anyone interested in bladesmithing.
Common Mistakes and Safety Tips
Beginners often encounter a few common pitfalls. Avoid overheating the steel, which can burn out the carbon and weaken the blade. Always wear protective gear, and keep your workspace organized to prevent accidents. Take your time with each step, focusing on accuracy rather than speed.
Frequently Asked Questions
What type of steel is best for beginner knife forging?
High carbon steels like 1084 or 1095 are recommended for beginners. They are easier to heat treat and provide a good balance of hardness and toughness for blades.
Do I need a power hammer to forge a knife?
No, a simple hand hammer and anvil are sufficient for beginners. While a power hammer speeds up the process, learning with hand tools helps develop foundational skills.
How long does it take to forge a basic knife?
For a first-time maker, expect the process to take several hours to a full day, depending on complexity and available tools. With practice, the process becomes faster and more efficient.
Conclusion
Forging a knife from start to finish is a challenging yet highly rewarding experience. By following this knife forging step by step guide, beginners can develop essential skills and gain a deeper appreciation for the craft. Remember to work safely, be patient, and enjoy the process of transforming raw steel into a functional, handmade tool.