Boning a chicken is a valuable skill for any kitchen professional or home cook looking to save money and utilize every part of the bird. Mastering how to bone a chicken with a boning knife not only enhances your culinary repertoire but also allows for more efficient meal preparation. In this guide, we will explore the techniques and tools necessary to expertly bone a chicken.
Understanding the Importance of Boning a Chicken
Before diving into the process, it’s crucial to understand the benefits of boning a chicken. By removing the bones, you can create more versatile dishes and ensure even cooking. Additionally, boning a chicken yourself often results in higher quality cuts and can be more cost-effective than purchasing pre-boned pieces.
The Role of a Boning Knife
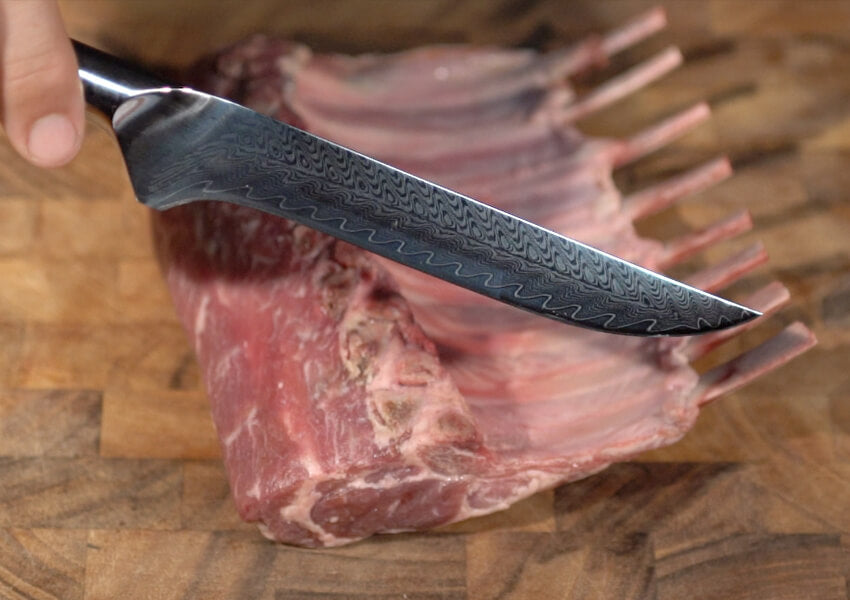
Using a boning knife is essential in this process. Its thin, flexible blade allows for precision cutting, making it easier to navigate around bones and joints. For more information on choosing the right boning knife, visit what makes a good boning knife.
Preparing Your Workspace
Having a clean, organized workspace is key to successfully boning a chicken. Ensure you have a sturdy cutting board, a sharp boning knife, and a clean towel on hand. It’s also important to practice proper sanitation by washing your hands and utensils thoroughly before and after handling raw poultry.
Essential Tools
- Boning knife – For precise cuts
- Cutting board – To provide a stable surface
- Kitchen towel – For cleanliness and wiping your hands
Step-by-Step Guide to Boning a Chicken
Let’s dive into the detailed steps of boning a chicken.
Step 1: Remove the Backbone
Start by placing the chicken breast-side down. Use your boning knife to cut along one side of the backbone from the neck to the tail. Repeat on the other side to fully remove the backbone. For a visual guide, you can refer to why use a boning knife for more insights.
Step 2: Separate the Breast
With the chicken open, locate the keel bone (breastbone) and use your fingers to gently separate it from the meat. Use your boning knife to carefully cut it away, ensuring to leave as much meat as possible attached to the breast.
Step 3: Remove the Wing Tips
Bend the wings to locate the joint, then use your boning knife to slice through the joint, removing the wing tips. These can be saved for stock.
Step 4: Separate the Thighs and Drumsticks
Flip the chicken over and cut through the skin between the thigh and the body. Bend the leg back until the joint pops, then use your boning knife to cut through the joint. Repeat with the other leg.
Tips for Success
Here are some tips to ensure your success in boning a chicken:
- Keep your boning knife sharp for clean cuts.
- Take your time to avoid wasting meat.
- Practice regularly to improve your technique.
Frequently Asked Questions
What is the best knife for boning a chicken?
A flexible boning knife is ideal for boning a chicken due to its precision and ease of use. Learn more about selecting the perfect knife at narrow boning knife.
How long does it take to bone a chicken?
With practice, boning a chicken typically takes about 15-20 minutes.
Can I use the bones for stock?
Absolutely! The bones and leftover parts are perfect for making a rich and flavorful stock.
Conclusion
Mastering how to bone a chicken with a boning knife is a valuable skill that can elevate your culinary abilities. By following this comprehensive guide, you’ll not only improve your knife skills but also make the most of every chicken you prepare. For more professional tips, visit professional boning knife tips.
This article contains affiliate links. We may earn a commission at no extra cost to you.
