
Understanding blade tapering in forging is essential for anyone interested in creating high-performance knives, swords, or tools. The process of shaping a blade so that it gradually thins from the base (ricasso or tang) to the tip is called distal tapering. This subtle, yet crucial, technique affects the balance, weight, cutting ability, and overall feel of the finished blade. Whether you are a beginner blacksmith or a seasoned bladesmith, mastering this aspect of forging can set your work apart and dramatically improve the functionality of your blades.
In this article, we’ll explore the principles behind distal taper, why it matters, and practical steps for achieving it during the forging process. You’ll also find helpful resources, visual examples, and answers to common questions about this foundational skill. For a deeper look at the craftsmanship involved in knife making, you can check out this detailed overview of hand-forged blade production.
What Is Distal Taper and Why Is It Important?
Distal taper refers to the gradual reduction in thickness of a blade from the base toward the tip. Unlike the edge bevel, which creates the sharp cutting edge, the distal taper is a longitudinal thinning that influences the entire blade’s cross-section. This feature is especially prominent in swords, chef knives, and other tools where balance and agility are critical.
The importance of distal taper lies in its impact on several key performance factors:
- Balance and Handling: A well-tapered blade feels lively and responsive in the hand, making it easier to control.
- Weight Distribution: Reducing unnecessary mass toward the tip lightens the blade without sacrificing strength at the base.
- Cutting Efficiency: Thinner tips penetrate materials more easily, while a thicker base provides durability and power.
- Flexibility and Strength: Proper tapering can enhance flexibility in longer blades and prevent breakage under stress.
Historically, many cultures developed their own approaches to blade geometry, but the principle of distal taper is nearly universal among high-quality forged blades.
Fundamentals of Blade Tapering in Forging
Achieving a consistent and functional taper requires both planning and skillful execution at the anvil. Here are the foundational steps and considerations:
- Material Selection: Start with a bar of steel that is thick enough to allow for shaping but not so thick that excessive material must be removed.
- Initial Forging: Establish the basic outline of the blade, paying attention to the width and profile.
- Controlled Drawing: Use the hammer and anvil to gradually thin the blade from the base toward the tip. Focus on even, progressive reduction rather than abrupt changes in thickness.
- Checking Progress: Regularly measure thickness along the length of the blade. Calipers or micrometers are useful for precision, but experienced smiths often rely on visual cues and feel.
- Heat Management: Work at appropriate forging temperatures to avoid cracking or burning the steel, especially as the blade becomes thinner.
It’s important to remember that once material is removed, it cannot be replaced. Patience and incremental adjustments are key to achieving a smooth, continuous taper.
Techniques for Achieving a Consistent Taper
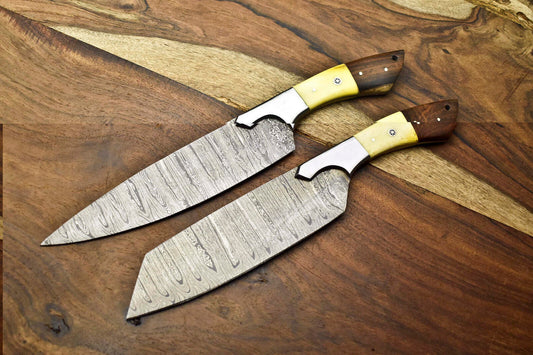
There are several methods smiths use to create a reliable distal taper during forging. Some of the most effective include:
- Progressive Hammering: Apply more force and time at the tip, gradually reducing as you move toward the base. This draws out the tip and thins it more than the tang area.
- Edge-to-Spine Tapering: In addition to lengthwise thinning, some blades benefit from a taper that also reduces thickness from the spine to the edge, further refining the geometry.
- Use of Fullers: Specialized tools called fullers can be used to create grooves or reduce mass in specific areas, aiding in weight reduction and flexibility.
- Thermal Cycling: Repeatedly heating and cooling the blade can help relieve stresses introduced during forging, making it easier to achieve a straight, even taper.
After forging, many bladesmiths refine the taper further during the grinding and finishing stages. However, the bulk of the taper should be established at the anvil to preserve material integrity and avoid excessive stock removal.
Common Challenges and Solutions
Even experienced smiths encounter difficulties when tapering blades. Here are some typical challenges and how to address them:
- Uneven Taper: If the blade is thicker on one side or has abrupt changes, reheat and carefully hammer the high spots, checking progress frequently.
- Over-Thinning the Tip: Thin tips are prone to overheating and burning. Work quickly but carefully, and use lower heats as the blade gets thinner.
- Warping: Uneven heating or hammering can cause the blade to bend. Straighten while hot, and use thermal cycling to relieve stress.
- Loss of Profile: Excessive tapering can distort the blade’s outline. Maintain the desired shape by adjusting hammer blows and using templates if necessary.
Patience, observation, and practice are the best remedies for these issues. Over time, your ability to judge and control the taper will improve.
Applications and Benefits of Proper Tapering
Blades with a well-executed distal taper are prized for their performance in a variety of settings:
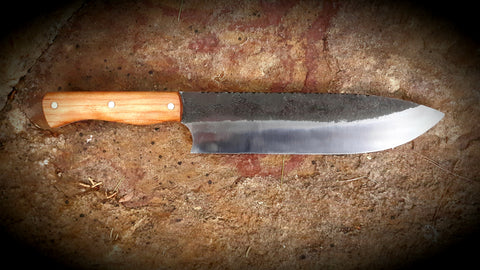
- Chef Knives: A gradual taper allows for precise slicing and reduces fatigue during extended use.
- Swords and Large Blades: Proper tapering balances reach and maneuverability, making the weapon both effective and comfortable to wield.
- Utility Tools: Even smaller knives and tools benefit from a lighter, more agile feel when the taper is done correctly.
In addition to functional advantages, a visually smooth taper is a hallmark of skilled craftsmanship. Collectors and users alike appreciate the attention to detail that goes into forging a blade with a refined geometry.
Frequently Asked Questions
How can I tell if my blade has the correct distal taper?
Check the thickness at several points along the blade using calipers. The change should be gradual and continuous from the base to the tip. Visually, the blade should look sleek and balanced, without abrupt steps or bulges.
Is it possible to add distal taper after forging?
While some taper can be refined during grinding, most of the shaping should be done during forging. Removing too much material in the grinding stage can weaken the blade and waste steel. Aim to establish the majority of the taper at the anvil.
What steel types are best for forging blades with a distal taper?
Most carbon steels used in bladesmithing, such as 1084, 5160, and 1095, are suitable for forging with a distal taper. The key is to choose a steel that responds well to heat treatment and can be forged without excessive cracking or warping.
Conclusion
Mastering the art of blade tapering in forging is a vital skill for anyone serious about knife or sword making. By understanding the principles of distal taper, practicing consistent forging techniques, and paying attention to detail, you can create blades that are not only beautiful but also highly functional. Whether you’re crafting a chef’s knife or a historical replica, a well-tapered blade will always stand out for its performance and craftsmanship.