Once a blade has been forged, the journey toward a finished knife or tool is far from over. The next critical stage—blade shaping after forging—is where the rough form is transformed into a precise, functional, and beautiful edge. This process is essential for achieving the desired profile, balance, and cutting performance. Whether you’re a hobbyist or a professional bladesmith, understanding the nuances of refining steel after forging can make the difference between a mediocre blade and a truly exceptional one.
In this article, we’ll explore the practical steps, tools, and techniques involved in shaping a blade after the initial forging. We’ll also discuss common challenges, safety considerations, and tips for achieving consistent results. For those interested in the broader context of forging, you can find a detailed overview of forging techniques and processes from industry experts.
Why Blade Shaping Is Essential After Forging
Forging gives steel its basic shape and structure, but the process leaves behind hammer marks, scale, and irregularities. The subsequent shaping phase refines the blade’s geometry, removes excess material, and prepares the steel for heat treatment and final finishing. Proper shaping ensures that the blade will have the correct thickness, bevels, and edge geometry for its intended use.
Skipping or rushing this stage can lead to performance issues, such as uneven edges, poor balance, or even structural weaknesses. That’s why careful attention to detail during this step is so important for anyone serious about knife making or tool crafting.
Key Steps in Shaping Steel After Forging
The process of refining a blade after forging typically involves several distinct steps. Each one contributes to the overall quality and performance of the finished product.
1. Cleaning and Preparing the Forged Blank
Before any detailed shaping can begin, it’s necessary to remove scale and oxidation from the forged steel. This is usually done with a wire brush, grinder, or belt sander. Cleaning the surface allows you to clearly see the blade’s contours and identify any areas that need extra attention.
2. Profiling the Blade
Profiling involves cutting and grinding the blade to its final outline. This step defines the overall shape, including the tip, spine, and tang. Most makers use an angle grinder, belt grinder, or files for this task. It’s important to work slowly and check your progress frequently to avoid removing too much material.
3. Establishing the Bevels
Beveling is the process of grinding the angled surfaces that lead to the cutting edge. This step is critical for both performance and aesthetics. The angle and width of the bevels will affect sharpness, durability, and ease of sharpening. Many bladesmiths use a belt grinder with different grit belts, starting coarse and moving finer as the shape develops.
Maintaining symmetry on both sides of the blade is important. Uneven bevels can cause the blade to cut poorly or even twist during use. Regularly checking with calipers or a bevel gauge helps ensure consistency.
4. Smoothing and Refining the Surface
After the basic shape and bevels are established, the blade is further refined by smoothing out scratches, tool marks, and minor imperfections. This can be done with finer grit belts, sanding blocks, or even hand files. The goal is to create a clean, even surface that’s ready for heat treatment and final finishing.
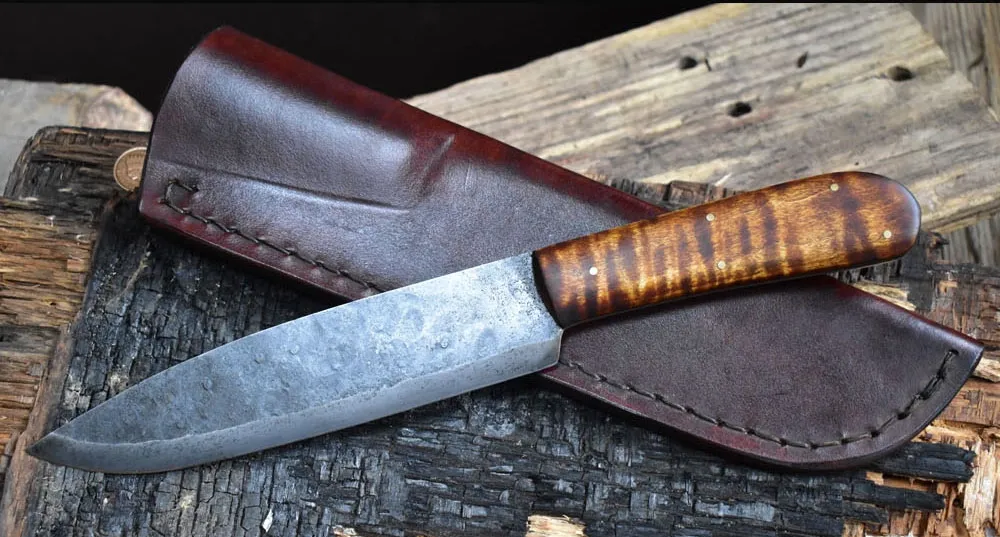
Tools Commonly Used for Post-Forging Shaping
The tools used for shaping steel after forging vary depending on the maker’s preferences, available equipment, and the type of blade being made. Some of the most common tools include:
- Belt grinders: Versatile machines for profiling, beveling, and smoothing.
- Angle grinders: Useful for rough shaping and removing large amounts of material quickly.
- Files: Essential for fine-tuning shapes, especially in tight areas or for those working without power tools.
- Sandpaper and sanding blocks: Used for hand finishing and smoothing surfaces.
- Calipers and bevel gauges: Help ensure accuracy and symmetry during shaping.
Each tool has its strengths and limitations. For beginners, starting with files and sandpaper can provide more control and reduce the risk of removing too much material too quickly.
Tips for Achieving Consistent Results
Refining a blade after forging requires patience and a methodical approach. Here are some practical tips to help achieve the best results:
- Work slowly and check often: It’s easier to remove more material than to add it back. Regularly check your progress against templates or drawings.
- Keep your workspace organized: Having tools and abrasives within easy reach helps maintain focus and efficiency.
- Use proper lighting: Good lighting reveals imperfections and helps you see the blade’s true contours.
- Stay safe: Always wear eye protection, gloves, and a dust mask when grinding or sanding steel.
- Practice makes perfect: Each blade you shape will teach you something new about steel, tools, and technique.
Common Challenges and How to Overcome Them
Even experienced makers encounter obstacles during the shaping process. Some of the most frequent issues include:
- Over-grinding: Accidentally removing too much material can ruin a blade. To avoid this, use light pressure and check your work frequently.
- Uneven bevels: Inconsistent angles can affect performance. Marking center lines and using guides can help maintain symmetry.
- Heat buildup: Grinding generates heat, which can affect steel properties. Dip the blade in water often to keep it cool.
- Surface scratches: Deep scratches left by coarse abrasives can be difficult to remove later. Progress through finer grits methodically.
Addressing these challenges early in the process saves time and ensures a higher-quality finished product.
Preparing for Heat Treatment and Final Finishing
Once the blade has been shaped and smoothed, it’s ready for heat treatment. This step hardens the steel and sets the foundation for the final edge. Before heat treating, make sure all major shaping is complete, as hardened steel is much more difficult to grind and file.
After heat treatment, the blade may require additional finishing, such as polishing, sharpening, and handle installation. The care taken during the shaping phase will make these final steps much easier and more effective.
FAQ: Blade Shaping and Refinement
What is the main purpose of shaping a blade after forging?
The primary goal is to refine the rough-forged blank into its final form, establishing the correct profile, bevels, and surface finish. This step ensures the blade will perform well and look professional.
Can I shape a blade entirely by hand?
Yes, it’s possible to shape a blade using only files and sandpaper. While this method is slower than using power tools, it offers greater control and is ideal for beginners or those without access to grinders.
How do I avoid overheating the blade during grinding?
To prevent heat buildup, use light pressure, keep the grinder speed moderate, and frequently dip the blade in water. Overheating can damage the steel’s structure, so it’s important to keep the blade cool throughout the process.