Forging a knife is only the beginning of the blade-making journey. Once the steel has been heated, hammered, and roughly formed, the next crucial step is refining the blade’s profile and edge through knife grinding after forging. This stage transforms a rough blank into a functional, sharp tool. Whether you’re a professional bladesmith or an enthusiastic hobbyist, understanding the nuances of post-forge grinding is essential for achieving a high-performance knife.
In this guide, we’ll break down the process of shaping and refining a blade after it leaves the forge. You’ll learn about the tools involved, the techniques for achieving a precise edge, and the common pitfalls to avoid. If you’re curious about the broader process of hand-forged knives, you can find more details in this in-depth explanation of hand-forged knife making.
Why Grinding Matters After Forging
After forging, a knife blank is often thick, uneven, and covered with scale. The process of refining the blade through grinding is what gives the knife its final shape, balance, and sharpness. Proper grinding removes excess material, establishes the bevels, and ensures the blade geometry is optimized for its intended use. Skipping or rushing this step can result in a blade that is difficult to sharpen, uncomfortable to use, or even structurally weak.
Grinding also allows for correction of minor forging errors and helps reveal any hidden flaws in the steel. By carefully working through the grinding stages, makers can achieve a smooth, even surface and a consistent edge profile that will perform well in real-world tasks.
Essential Tools for Post-Forging Blade Shaping
Successful knife grinding after forging relies on the right equipment. While some traditionalists use only hand files and stones, most modern makers turn to powered tools for efficiency and precision. Here are the most common tools used in this stage:
- Belt Grinder: The workhorse of most knife shops, a belt grinder with variable speed and multiple grit belts allows for rapid material removal and fine finishing.
- Angle Grinder: Useful for rough shaping and removing scale, especially on larger blades.
- Files: Essential for detail work, refining plunge lines, and working in tight areas.
- Sandpaper and Stones: Used for hand-sanding and final polishing after the main grinding is complete.
- Protective Gear: Safety glasses, gloves, and a dust mask are vital to protect against sparks, debris, and fine metal dust.
Step-by-Step: The Knife Grinding Process After Forging
Transforming a forged blank into a finished blade involves several grinding stages. Each step builds upon the last, gradually refining the blade’s form and edge. Here’s a breakdown of the typical workflow:
1. Cleaning and Preparing the Blank
Start by removing any scale, slag, or oxidation left from the forge. An angle grinder or coarse belt can quickly strip away these surface imperfections. This step is important for visibility and safety, as scale can cause belt slippage or uneven grinding.
2. Profiling the Blade
Profiling involves shaping the outline of the knife. Use a coarse belt (36–60 grit) to define the spine, tip, and handle area. Take care to keep the profile symmetrical and true to your design. At this stage, it’s easier to correct mistakes before moving on to more detailed work.
3. Establishing the Bevels
This is where the blade begins to take on its cutting geometry. Using a medium grit belt (80–120), grind the bevels on each side, aiming for evenness and symmetry. Many makers use a jig or guide to maintain a consistent angle, especially when learning. Watch the heat—overheating can ruin the steel’s temper. Dip the blade in water frequently to keep it cool.
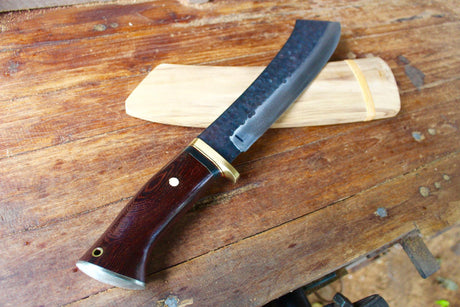
4. Refining the Edge and Plunge Lines
Switch to finer grits (220 and up) to smooth out the bevels and define the plunge lines—the transition between the blade and tang. At this point, focus on achieving crisp, clean lines and a consistent edge thickness. The blade should be left slightly thick at the edge to prevent warping during heat treatment, if it hasn’t been hardened yet.
5. Final Sanding and Polishing
Once the blade is heat treated and tempered, return to the grinder with fine belts or hand-sand with progressively finer grits. This removes any remaining scratches and prepares the blade for sharpening. Some makers finish with a mirror polish, while others prefer a satin or matte finish for practical use.
Common Mistakes and How to Avoid Them
Even experienced makers can run into issues during knife grinding after forging. Here are some frequent problems and tips for preventing them:
- Overheating the Blade: Excessive heat can ruin the steel’s temper. Always keep the blade cool by dipping it in water and using light pressure.
- Uneven Bevels: Inconsistent grinding can lead to a lopsided edge. Use reference marks, check your progress often, and practice steady hand movements.
- Deep Scratches: Skipping grits or using worn belts can leave scratches that are hard to remove. Progress through grits methodically and replace belts as needed.
- Thin Edges Before Heat Treat: Grinding the edge too thin before hardening can cause warping or cracking. Leave a small “edge thickness” until after heat treatment.
Tips for Achieving a Professional Finish
To get the best results from your post-forge grinding, keep these tips in mind:
- Work in Good Light: Proper lighting helps you spot irregularities and maintain symmetry.
- Take Your Time: Rushing can lead to mistakes. Slow, deliberate passes produce better results than aggressive grinding.
- Check Progress Frequently: Stop often to inspect the blade from multiple angles and measure thickness.
- Maintain Your Equipment: Sharp, clean belts and well-tuned machines make the process smoother and safer.
Frequently Asked Questions
How thin should the edge be after grinding but before heat treatment?
It’s best to leave the edge about the thickness of a dime (around 1 mm) before heat treating. This helps prevent warping or cracking during quenching. After hardening and tempering, you can grind the edge down to its final sharpness.
What grit belts should I use for each stage?
Start with coarse grits (36–60) for profiling and heavy material removal, move to medium grits (80–120) for bevels, and finish with fine grits (220 and up) for smoothing and polishing. Always progress through each stage to avoid deep scratches.
Can I grind a knife entirely by hand?
Yes, it’s possible to shape and finish a blade using only files and stones. However, this method is much slower and requires patience and skill. Many makers use a combination of power tools for rough work and hand tools for detail and finishing.
Conclusion
Mastering knife grinding after forging is essential for anyone serious about blade making. By understanding the process, using the right tools, and practicing careful technique, you can transform a rough-forged blank into a beautifully finished knife. Take your time, focus on precision, and don’t be afraid to learn from mistakes. With each blade, your skills will improve—and so will the quality of your finished knives.