There’s nothing quite like the taste of perfectly grilled ham, especially when you learn how to cook a ham on a gas grill. This technique combines the sweet and savory flavors of ham with the smoky essence unique to outdoor grilling. In this extensive guide, we’ll delve into every aspect of grilling ham, ensuring you achieve culinary perfection with every attempt.
Cooking a ham on a gas grill may seem daunting at first, but rest assured, with the right instructions and tips, you will discover it’s an incredibly rewarding process. Whether you’re hosting a family gathering, a festive holiday meal, or simply craving something different, this guide has got you covered.
The Appeal of Grilled Ham
Grilling ham elevates this already tasty meat to another level. The grill’s heat caramelizes the sugars in the glaze, creating a deliciously crispy exterior while ensuring the interior remains juicy and tender. Moreover, grilling imparts a unique smoky flavor that can’t be replicated in an oven.
The versatility of a grilled ham is noteworthy. You can pair it with a variety of sides from creamy potato salads and grilled vegetables to summer’s beloved coleslaw. This makes it an ideal centerpiece for any culinary occasion. Ready to embark on the journey of mastering how to cook a ham on a gas grill? Let’s dive in.
:max_bytes(150000):strip_icc()/Web_4000-sea-product-weber-spirit-ii-e-310-3-burner-rkilgore-45-71a7b6f74de047bcbb5e65bcca5c432a.jpg)
Choosing the Perfect Ham
When it comes to selecting the perfect ham for grilling, the options are plentiful. However, not all hams are created equal. Understanding the different types will help you make an informed decision that suits your taste and grilling preferences.
Types of Ham
BONE-IN HAM: This type of ham includes the bone, which adds flavor during the cooking process. It is usually more challenging to carve but offers a superior taste compared to its boneless counterpart.
BONELESS HAM: Easier to handle and carve, a boneless ham is perfect for those who prefer convenience. It is typically shaped and pressed to retain its form.
COUNTRY HAM: Known for its intense flavor, country ham is dry-cured with salt and typically requires soaking to remove excess salt before grilling.
CITY HAM: A popular choice, city ham is wet-cured and can be found either with or without the bone.
Considerations When Buying Ham
When buying a ham, consider its size relative to your grill. The ham should ideally fit comfortably on your grill rack without extensive trimming. Always check the label for information on whether it is pre-cooked, as this will impact the grilling time.
Looking for a high-quality knife to carve your ham? Learn more about choosing the right chef’s knife for carving.

Preparing the Ham
Preparation is key when learning how to cook a ham on a gas grill. Proper preparation ensures that your ham not only cooks evenly but also maximizes flavor.
Thawing the Ham
If you’re using a frozen ham, ensure it is fully thawed before grilling. Thawing can be done in the refrigerator, which may take up to 24 hours for larger hams. A quicker alternative is the cold water method. Immerse the ham in a sink full of cold water, changing the water every 30 minutes until thawed.
Trimming the Fat
Trimming excess fat from your ham can prevent flare-ups during grilling. However, leave a thin layer, as it helps to keep the meat moist and adds flavor. Score the fat layer in a crosshatch pattern to allow the glaze to penetrate better.
Using a Marinade or Brine
Marinating or brining adds moisture and flavor to your ham. A simple brine can be made with water, salt, sugar, and your choice of spices. If marinating, ensure the ham is covered and refrigerated for at least 8 hours or overnight.
A comprehensive guide to using fillet knives can further enhance your preparation process.
Setting Up the Gas Grill
Understanding your gas grill is crucial when learning how to cook a ham on a gas grill. Proper setup ensures efficient grilling and a delicious outcome.
Preheating the Grill
Preheating your gas grill is essential before placing the ham. Set the grill to medium heat (around 325F). Allow it to reach the desired temperature before moving on to the next steps.
Creating Indirect Heat
Indirect heat is vital for grilling ham, ensuring it cooks evenly without burning. Turn off one burner and place the ham on the unheated side. This method mimics oven roasting, enabling the ham to cook slowly and absorb the grill’s flavors.
Using a Drip Pan
Place a drip pan filled with a bit of water or apple juice beneath the ham. This catches fat drippings and helps maintain moisture within the grill, preventing the ham from drying out.
For more tips on maintaining your grill and tools, check out our guide on sharpening knives.
Grilling the Ham
The actual grilling process is where you bring all preparation efforts to fruition. Following these steps ensures your ham is cooked to perfection.
Cooking Time and Temperature
Place the ham on the grill, on the side with the burner turned off. Close the lid and monitor the temperature regularly to keep it steady at 325F. Depending on the size of the ham and whether it’s pre-cooked or raw, grilling can take anywhere from 15 to 20 minutes per pound. A pre-cooked ham requires less time than a raw one.
Use a meat thermometer to ensure your ham reaches an internal temperature of 140F for pre-cooked or 160F for raw hams. Insert the thermometer into the thickest part of the ham without touching the bone to get an accurate reading.
Applying the Glaze
The glaze is what gives the ham its delightful, caramelized crust. Apply your chosen glaze during the last 30 minutes of grilling to prevent it from burning. You can glaze the ham multiple times, allowing each layer to set before applying the next.
Rotating the Ham
Rotate the ham approximately every 15 to 20 minutes to ensure even cooking and browning. This step is crucial, especially when using indirect heat. Be cautious when opening the lid, as sudden temperature drops can hinder the cooking process.
Resting the Ham
Once the ham has reached the desired internal temperature, remove it from the grill and let it rest for 15 to 20 minutes before carving. Resting allows the juices to redistribute throughout the meat, ensuring each slice is moist and flavorful.
For best results while slicing the ham, use a sharp knife. Check out our tips on choosing the right knife for the job.
Serving Suggestions
Now that you’ve mastered how to cook a ham on a gas grill, it’s time to think about how you’ll serve your masterpiece. From side dishes to presentation tips, we’ve got everything you need to create a memorable meal.
Side Dishes
Grilled ham pairs well with a variety of side dishes:
- POTATO SALAD: A classic choice that balances the savory ham with creamy textures and flavors.
- GRILLED VEGETABLES: Enhance the smoky flavor of the ham with a medley of grilled vegetables like zucchini, bell peppers, and asparagus.
- COLESLAW: This tangy and crunchy salad offers a refreshing contrast to the rich, glazed ham.
- MAC AND CHEESE: A comfort food staple that adds creamy, cheesy goodness to your meal.
Presentation Tips
Presentation matters, especially when you’re showcasing hours of hard work:
- SLICING: Use a sharp knife to carve thin, even slices. Ensure the cuts are clean to display the ham’s juicy interior.
- PLATING: Arrange the slices neatly on a large platter. Garnish with fresh herbs or fruit slices for a pop of color and added flavor.
- SAUCE: Serve extra glaze or a complementary sauce on the side for added flavor options.
Tools and Maintenance
Having the right tools and maintaining them is crucial for any grilling enthusiast. Here are some essential grill tools and how to care for them:
Essential Tools
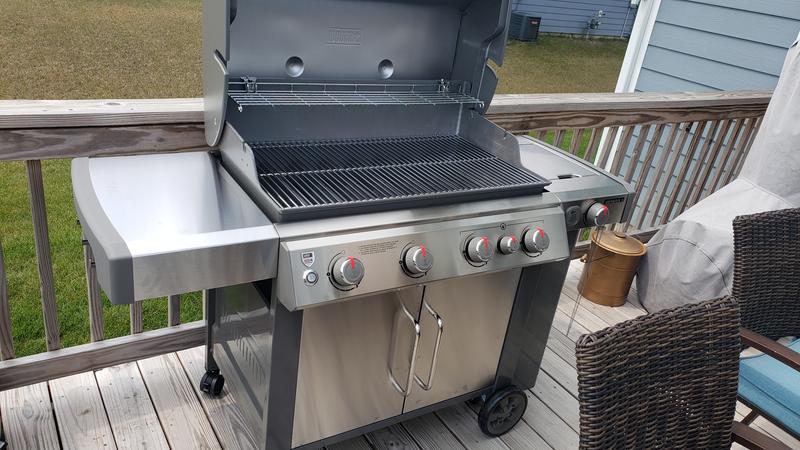
- GAS GRILL: A reliable gas grill is the foundation of successful grilling. Ensure it has adjustable heat settings and ample space for your ham. [Buy a Gas Grill]
- SHARP KNIFE: A sharp knife is essential for trimming and carving your ham. A high-quality chef’s knife is ideal.
- MEAT THERMOMETER: To ensure your ham reaches the right internal temperature, a reliable meat thermometer is a must.
- DRIP PAN: Collects drippings and adds moisture to the grill environment, preventing the ham from drying out.
- CUTTING BOARD: A sturdy cutting board for resting and carving the ham. [Buy a Cutting Board]
Tool Maintenance
Proper maintenance ensures your tools remain in top condition:
- GRILL CLEANER: Regularly clean your grill with a quality grill cleaner to prevent buildup and ensure even cooking. [Buy a Grill Cleaner]
- KNIFE SHARPENER: Keep your knives sharp with a reliable knife sharpener. Discover how to maintain sharp knives at Knives Genius.
- WOOD CONDITIONER: Maintain cutting boards with a wood conditioner to prolong their lifespan. [Buy a Cutting Board Conditioner]
Conclusion
Learning how to cook a ham on a gas grill elevates a traditional dish to new heights. With the right preparation, tools, and techniques, anyone can master this flavorful cooking method. Remember, the key to a perfect grilled ham lies in selecting the right ham, preparing it adequately, and grilling it with care. The end result? A juicy, tender, and flavorful dish that will impress your guests every time.
For more recipes and cooking tips, visit Dish ‘n’ the Kitchen.
As an Amazon Associate, I earn from qualifying purchases.
