Nowadays, it is vital to consider keeping your knife sharp because it brings ease in cutting through food with minimal slippage. Normally dull knives are considered dangerous since they require extra force to get the job done; therefore, they bring about changes to missing or slipping on the actual mark. Sharpening and care of kitchen knives are easier than you think. If you are interested in making thin slices or not, the knife users need to learn the important ways how to sharpen your knife. Blunt knives tend to injure the knife user since you will need to force a cut instead of just knife work easily. This article will understand the different methods and tools to help you sharpen your kitchen knife better and easier.
Best Ways How To Sharpen A Kitchen Knife
Use Of A Knife Sharpening Steel
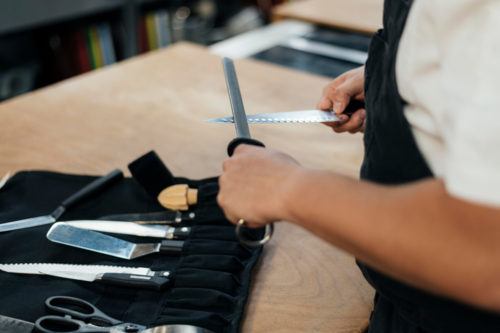
Sharpening steel is a metallic rod normally sold in one park with knives. It helps to hone a knife-edge with a dulled blade. It does not sharpen a knife, though. The user sweeps the blade edge along the steel realigns. The user needs to consider maintaining a 15 degrees angle between the steel and the blade motion.
There are three important steps the knife user should consider when using a knife sharpening steel to sharpen their kitchen knife.
Step 1
It is advisable to hold sharpening steel vertically since it is considered safe with the tip firmly positioned on the counter. The blade’s heel should be placed against the tip of the steel and point the kitchen knife tip slightly upward to approximately 15 degrees angle away from the steel.
Step 2
Maintaining a 15-degree angle and the light pressure between the steel and the blade is crucial. Slide the knife blade in a sweeping motion down towards the length of the steel; Pull the knife so that the center of the blade is in contact with the middle part of the steel.
Steel 3
Pass the blade’s tip over the bottom part of the steel to help you finish the motion. Generally, it is important to repeat the same motion to four or five strokes on both sides on the other side of the blade.

Use Of A Whetstone
Whetstone is one of the preferred ways to make sure your kitchen knife blade is in good condition for use, and this method can be achieved in just a few steps.
Step 1
Make sure you wet the stone.
Beginners should consider wetting your whetstone. Submerge your stone in the water for at least 45 minutes until no more air bubbles are coming out of the stone, although the longer you submerge it in water, the better.
Step 2
Positioning to the correct angle
It is important to find the right angle since it helps determine your edge pointy. Though the less the angle, the better the pointy because knives with pointy edges are preferred for cutting and slicing. But they are not durable also. The less the pointy edge is, the greater the durability but not preferred for cutting.
Step 3
Consider (Re) defining the edge.
Dully knives are not only dangerous but also annoying to the user. After you have prepared the stone and come up with the right angle, you need to get the blade sharp by re-defining the edge.
Step 4
It would be best if you consider polished the edge.
This step is the best descriptor though it is not polishing the blade. You must have 4-6 different stones that vary with the size of the grit. Beginners should consider flipping their knife over the finer gilt and repeat the process on both sides of the blade.
Step 5
Hone your knife’s edge
This is the final step to complete the process, where you will need to use the honing steel and hone your blade while maintaining the same angle you imposed on step two. You carefully pass both sides of the blade along with your honing steel 2 to 3 times, and this procedure will assist in smoothening and aligning the blade,
Use Of An Electric Knife Sharper
Electric sharpers are different; therefore, the user should consider reading the manual guidelines first before you start sharpening your knife. Moreso, there are a few steps you need to understand and follow.
Step 1
Setting the electric sharpener on a flat, stable surface
The user needs to make sure your knife sharpener is placed on a flat, stable surface before considering plugging in or using it.
Step 2
Consider adjusting the blade selector.
The user needs to make sure they select the preferred or the corresponding category; that is, thin, medium, or thick as per your blade selector.
Step 3
Assessing the stat that you’ll use
It would be best to consider assessing and turning on the stage that you need to sharpen your kitchen knife. Normally, a very dull knife will require you to go through the coarsest setting to make sure the sharpener blades polish well.
Step 4
Should consider the first stage of coursing
Consider placing your knife on the appropriate slot, slowly as the manual stipulates. Repeat the same step on the alternative edge of the blade. The user knows that most electric sharpers have two slots, the first slot on the right side and the second on the left side of the knife. The user should consider repeating the procedure 1 to 2 times in the stage till you feel a burr on the knife’s edge.
Step 5
Consider repeating the second and the third steps.
When necessary, the user should repeat the sharpening procedure with stages 2 and 3. You will need to implicit a couple of pulls in each stage. Conclusively, an electric knife sharper is best to sharpen your kitchen knife. Normally, the electric sharpener has a simpler learning curve than a normal manual sharpener and a whetstone. Moreover, it is fast to use and can be used in various knives. Further, it allows the knife user to sharpen their knife at home with no extra cost for the sharpening service.


